由于工作需求,需要给WebAI/WebBit/Smart做一个量产自动烧录固件的环境。在这里我使用的是BPI-M1+和Openwrt系统
固件烧录
目前最新的Openwrt系统是19.07.7,下载地址
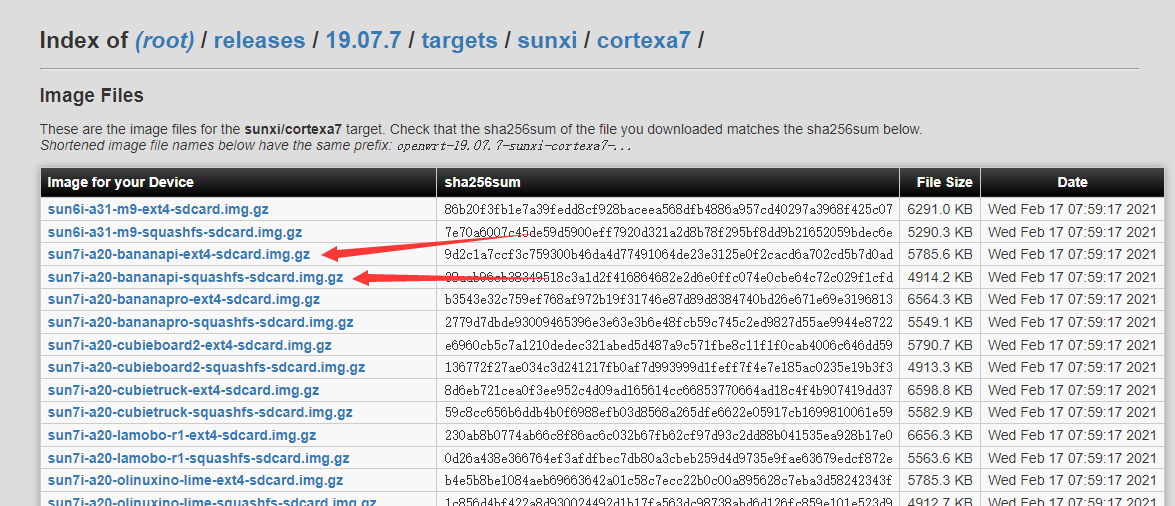
这里有两个系统,区别是不同的文件系统,两个系统都可以用。烧录工具推荐使用balenaEtcher,官网:https://www.balena.io/etcher/
基本环境安装
系统烧录完成后需要安装一系列的软件,但是默认的配置中eth0的DHCP是服务端的,且为LAN,获取不了IP,所以需要修改配置文件。(eth0为LAN, eth1为WAN (针对BananaPi R1))
有两种方式修改M1+配置
1、通过串口进入系统修改
2、将网线插到电脑上面,通过ssh进入系统修改
在这里我是通过串口进的终端,修改配置前,需要先将配置文件备份
cp /etc/config/network /etc/config/network.bak
然后修改network配置
vi /etc/config/network
以下是network配置
config interface 'loopback'
 option ifname 'lo'
 option proto 'static'
 option ipaddr '127.0.0.1'
 option netmask '255.0.0.0'

config globals 'globals'
 option ula_prefix 'fdea:5cdd:a6e7::/48'

config interface 'wan'  //配置eth0为wan,并开启DHCP客户端
 option ifname 'eth0'
 option proto 'dhcp'

config interface 'lan'  //配置eth1为lan,且桥接,设置网关地址
 option ifname 'eth1'
 option type 'bridge'
 option proto 'static'
 option ipaddr '192.168.1.1'
 option netmask '255.255.255.0'
 option ip6assign '60'
修改之后重启网络服务
/etc/init.d/network restart
重启后你会发现M1+获取到了路由器分配的IP,这里我获取到的IP是192.168.11.122 ,访问IP会发现页面打不开,是因为防火墙的原因
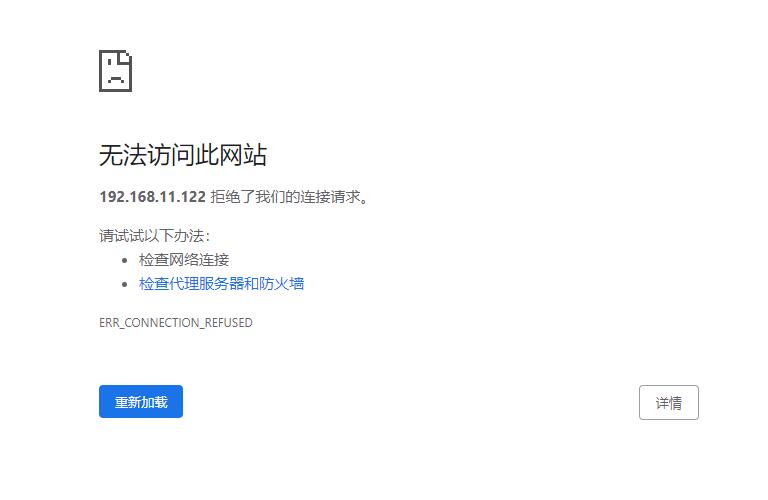
这里你需要禁用掉防火墙
/etc/init.d/firewall stop
/etc/init.d/firewall disable
然后就可以访问了。默认用户名是root,密码为空。
首先更新一下源
opkg update
这里由于用到了rtl8192CU的WiFi网卡,所以需要安装驱动
opkg install kmod-rtlwifi-usb kmod-rtl8192c-common rtl8192cu-firmware kmod-lib80211
以及用8192作为ap所需的软件
opkg install kmod-rtl8192cu hostapd hostapd-common hostapd-utils
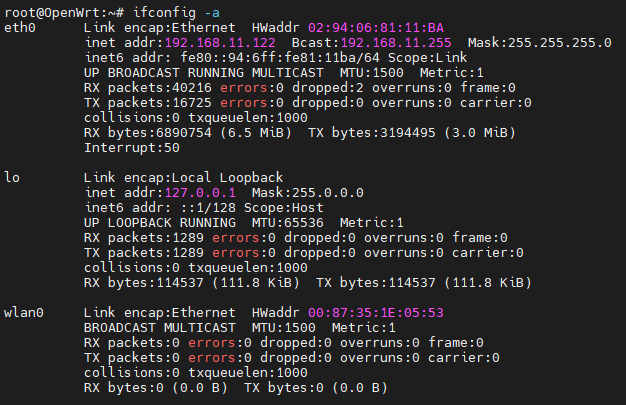
安装完成后,可以在ifconfig -a中看到wlan0
修改/etc/config/wireless
cp /etc/config/wireless /etc/config/wireless.bak
vi /etc/config/wireless
将第七行 option disabled ‘1’中的1改为0,最后得到以下结果
config wifi-device 'radio0'
        option type 'mac80211'
        option channel '11'
        option hwmode '11g'
        option path 'platform/soc@01c00000/1c14000.usb/usb1/1-1/1-1:1.0'
        option htmode 'HT20'
        option disabled '0'

config wifi-iface 'default_radio0'
        option device 'radio0'
        option network 'lan'
        option mode 'ap'
        option ssid 'OpenWrt'
        option encryption 'none'
最后重启网络就好了
/etc/init.d/network restart
产测程序安装
WebAI板载了k210和esp8285两种芯片,其中k210芯片用的是ch340芯片,而esp8285芯片只是引出了串口,reset和dtr接口,需要外接usb转ttl芯片,在这里我用的是cp2102芯片,另外可以通过cp2102和ch340的驱动来区分两和主控芯片,从而执行不同的烧录程序。
WebBit板子用的是esp32芯片,Smart芯片用的是esp8266芯片,这两个芯片的下载芯片都是ch340。
k210用的是kflash软件烧录。esp8285芯片、esp32、esp8266芯片用的是esptool软件。
esptool要用到python所以需要安装python3以及pip
opkg install fdisk block-mount python3 python3-pip python3-packages
cp2102和ch340的驱动
opkg install kmod-usb-serial-cp210x usbutils kmod-usb-serial-ch341
esotool有用到serial,所以需要安装
pip3 install pyserial
WebAI板的产测有用到stty来通过串口给AI板发送命令,所以需要安装coreutils-stty
opkg install coreutils-stty
参考资料
https://openwrt.org/toh/hwdata/lemaker/lemaker_bananapi
https://linux-sunxi.org/LeMaker_Banana_Pi
https://oldwiki.archive.openwrt.org/doc/hardware/soc/soc.allwinner.sunxi#pre-built.sd.card.images
WIFI配置
有的板子曾经需要测试WiFi效果,这时需要打开WiFi,默认配置好像不太能启动,需要修改一下配置(很奇怪,第二次复现的时候WiFi居然启动了,以防万一记录一下)
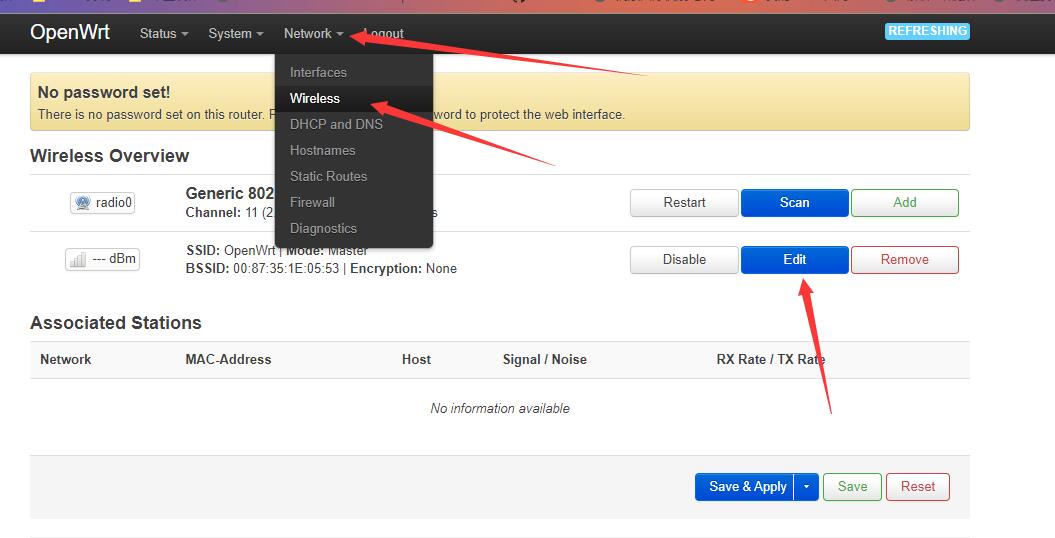
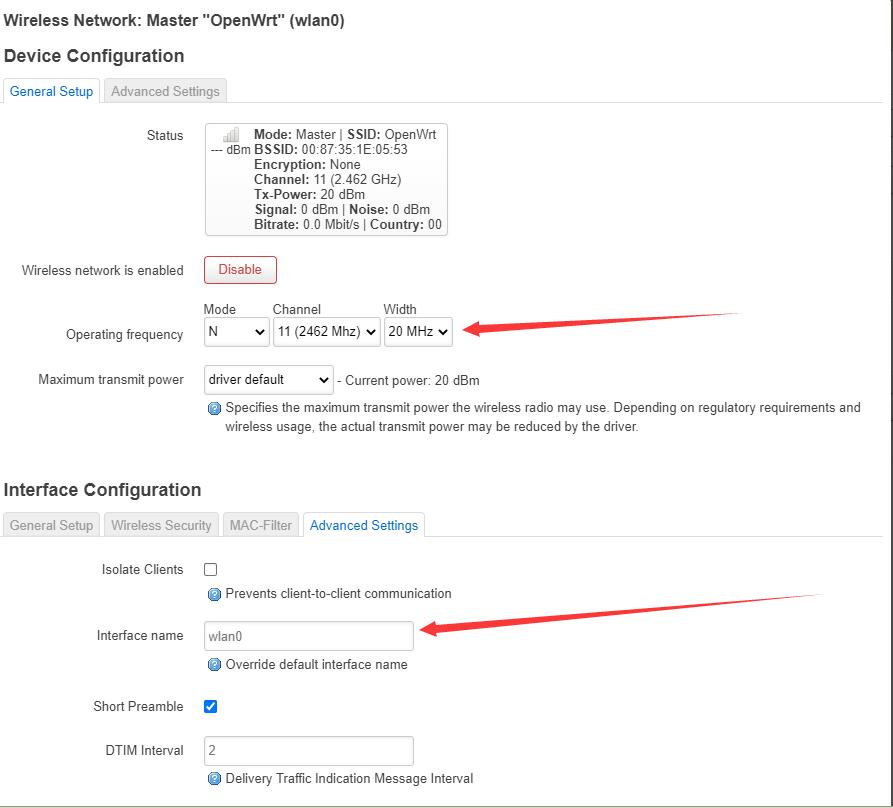
首先打开Network–>Wireless,点击Edit
进到设置界面之后,把设置改为以下
想要访问外网就需要把General Setup下面的Network添加lan和wan
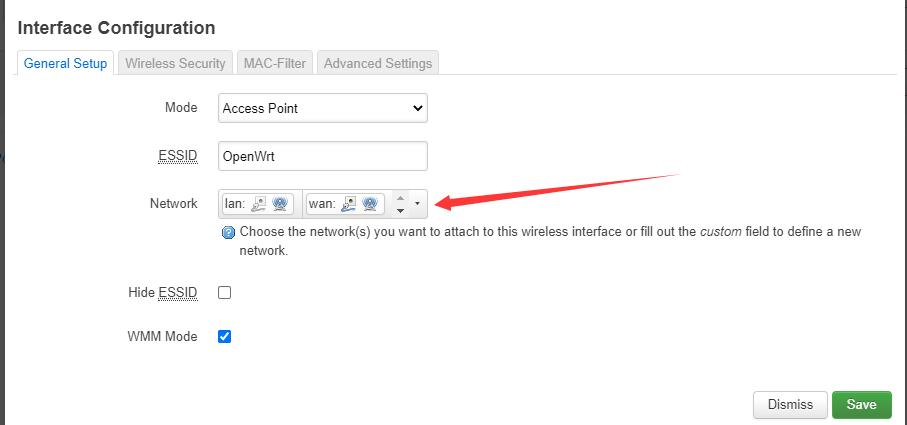
保存+应用就好了
其他板子
Artec
Artec有一个比较特殊的下载器,是用STM32F042模拟USB串口,类似于Arduino UNO的ATMega16U2
使用的是dfu-util,所以需要先安装
opkg install dfu-util
dfu-util -v -a 0 -R -D /path/to/file.dfu
下面是关于dfu-util的介绍
https://openwrt.org/packages/pkgdata/dfu-util
http://dfu-util.sourceforge.net/
打不开了http://dfu-util.gnumonks.org/dfuse.html
Arduino UNO/nano
dfu-util -v -a 0 -R -D /path/to/file.dfu
stm32 usb Dfu协议驱动安装的步骤
STM32 DFU software for Linux
烧录 STM32F042
# dfu-util -h
Usage: dfu-util [options] ...
  -h --help                     Print this help message
  -V --version                  Print the version number
  -v --verbose                  Print verbose debug statements
  -l --list                     List currently attached DFU capable devices
  -e --detach                   Detach currently attached DFU capable devices
  -E --detach-delay seconds     Time to wait before reopening a device after detach
  -d --device <vendor>:<product>[,<vendor_dfu>:<product_dfu>]
                                Specify Vendor/Product ID(s) of DFU device
  -p --path <bus-port. ... .port>       Specify path to DFU device
  -c --cfg <config_nr>          Specify the Configuration of DFU device
  -i --intf <intf_nr>           Specify the DFU Interface number
  -S --serial <serial_string>[,<serial_string_dfu>]
                                Specify Serial String of DFU device
  -a --alt <alt>                Specify the Altsetting of the DFU Interface
                                by name or by number
  -t --transfer-size <size>     Specify the number of bytes per USB Transfer
  -U --upload <file>            Read firmware from device into <file>
  -Z --upload-size <bytes>      Specify the expected upload size in bytes
  -D --download <file>          Write firmware from <file> into device
  -R --reset                    Issue USB Reset signalling once we're finished
  -s --dfuse-address <address>  ST DfuSe mode, specify target address for
                                raw file download or upload. Not applicable for
                                DfuSe file (.dfu) downloads
# Product = STM32 BOOLOADER
# VID 0482
# PID df11
# alt = 0 -> internal flash
# p 2-1.4.3 -> usb [bus-port.  …  . port]
# dfu-util -a 0 -R -p 2-1.4.3 -D studuinobit_STM32F042_Flash_20190306.dfu
烧录 ESP32
# Product = STM32 Virtual ComPort
# VID = 20a0
# PID = 4269
STM32 Virtual COM Port
在有的Linux系统中,像这种虚拟的USB转ttl,会被挂载为ttyACM,所以需要安装kmod-usb-acm
opkg install kmod-usb-acm
Arduino UNO
Arduino UNO用的是USBASP,暂时没有找到USBASP的板子,先把代码贴在这里
avrdude -c usbasp -p m16u2 -P usb -B 10 -u -e
avrdude -c usbasp -p m16u2 -P usb -B 10 -u -U hfuse:w:0xD9:m -U lfuse:w:0xFF:m -U efuse:w:0xF4:m
avrdude -c usbasp -p m16u2 -P usb -B 10 -u -e -U flash:w:"16u2.hex":a
写在最后
其实只要是架构没问题,可以随意切换为其他板子烧录,后面的Artec和UNO近期没有产测需求,只能等以后再补了,先挖一个坑,后面再填(Artec相关的已更新,看这里)
最后把软件安装的东西放在一起,方便后面用
opkg update
opkg install kmod-rtlwifi-usb kmod-rtl8192c-common rtl8192cu-firmware kmod-lib80211 kmod-rtl8192cu hostapd  hostapd-common hostapd-utils fdisk block-mount python3 python3-pip python3-packages kmod-usb-serial-cp210x usbutils kmod-usb-serial-ch341 coreutils-stty dfu-util kmod-usb-acm
pip3 install pyserial
暂无评论