[lwptoc skipHeadingLevel=”h3,h4″ skipHeadingText=””]
前言
上一篇入门到放弃讲到创建项目,这次记录一下做插件需要注意的几个关键点,以及项目文件的介绍。
文件准备
创建完项目后,可以看到下面这几个文件
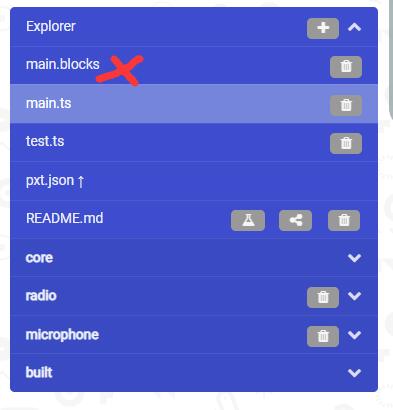
其中main.blocks这个文件是需要删掉的。点击右边的垃圾桶图标,将这个文件删掉。
main.ts文件是写代码的主要地方,大多数人都把代码放在这里,也有特殊的,像DFRobot家的Maqueen,新建了一个maqueen.ts,并且把代码放在了这里。(至于怎么做到的,还没仔细研究,先插个旗子,等以后有时间看看)
test.ts文件是测试文件,提交的时候必须要这个文件存在。根据官方的说法,如果你想定期测试TypeScript API,不再需要新建项目,导入插件这么复杂的步骤,项目中有使用这个API的代码,您不需要一个单独的测试项目即可,该项目中包含可以使用这些API的代码。
To test TypeScript APIs regularly, you don’t need to have a separate test project available that has code to exercise the APIs. Instead, you include a test.ts file in the extension itself which contains the tests. This file is only used when you run the extension directly, not when you add the extension to a project. The tests you create are valid code that use your extension APIs.
pxt.json是整个项目的配置文件,里面包含了项目名称,项目描述,所需依赖,以及项目里所有文件,测试文件,支持的平台
{
    "name": "blog-test",     //这里是项目名字
    "description": "",       //这里写上项目的描述
    "dependencies": {        //这里是这个项目的依赖库,引用了什么库可以在这里加上,当然如果不需要的库也可以删掉。如果你的库有用到蓝牙,那么你需要把radio删掉,因为这两个库有引脚冲突
        "core": "*",
        "radio": "*",
        "microphone": "*"
    },
    "files": [               //files这里是所有文件的索引,相当于一个目录,导入项目时会加载这些文件。
        "main.ts",
        "README.md"
    ],
    "testFiles": [           //test.ts是测试文件,用于快捷测试插件
        "test.ts"
    ],
    "supportedTargets": [    //适用平台,microbit
        "microbit"
    ],
    "preferredEditor": "tsprj"
}
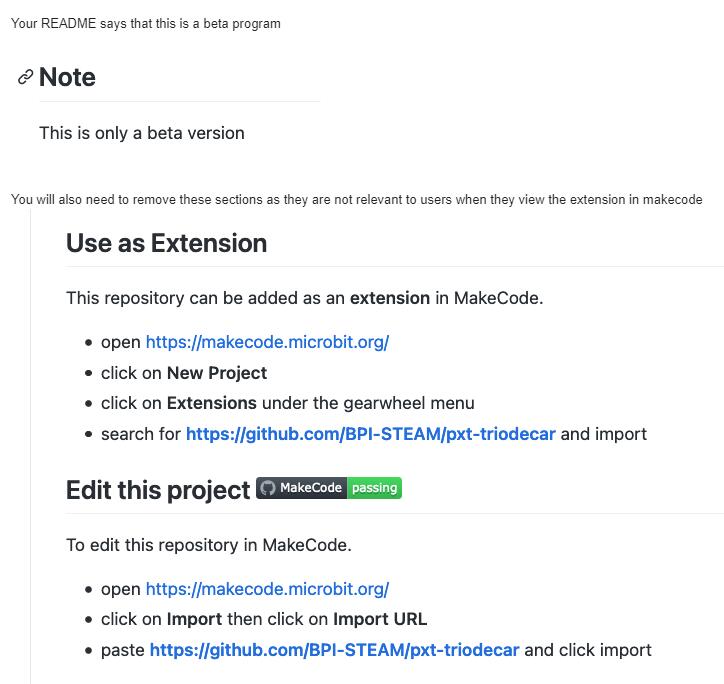
README.md是项目的介绍,这个文件是自动生成的,这里需要注意,有些内容是需要删掉的。大球在申请插件过程中也踩到了坑
1、申请需要不在Beta版本,不然不通过(这里有点坑,因为官方说的是,如果你的插件是Beta版本,你需要标记)
The extension is in a finished state. Extensions that are in development should be marked ‘beta’ in the repository description.
2、有些内容是需要删掉的。
另外,在_locales文件夹下面是本地化的文件,例如:_locales/zh/blog-test-strings.json,如果切换为其他语言,会自动创建,只需要把相关的关键词替换就能实现各种语言切换了
参考链接
pxt.json介绍:https://makecode.com/extensions/pxt-json
测试插件的介绍:https://maker.makecode.com/github/test-extension
暂无评论